Locking / unlocking filters
Modified on Wed, 14 Aug, 2024 at 3:09 PM
TABLE OF CONTENTS
- Introduction
- Step-by-Step Guide - utilising the current selections bell
- Step-by-Step Guide - utilising the selections along the top bar
Introduction
This article will take you through how to lock and unlock filters in the Platform. Locking filters in place men's that there is no risk of these being cleared or overwritten by any other selections. For example, you may wish to lock in a date range if that is a key focus for you. There are 2 ways to do this. Below is a breakdown of both methods.
Step-by-Step Guide - utilising the current selections bell
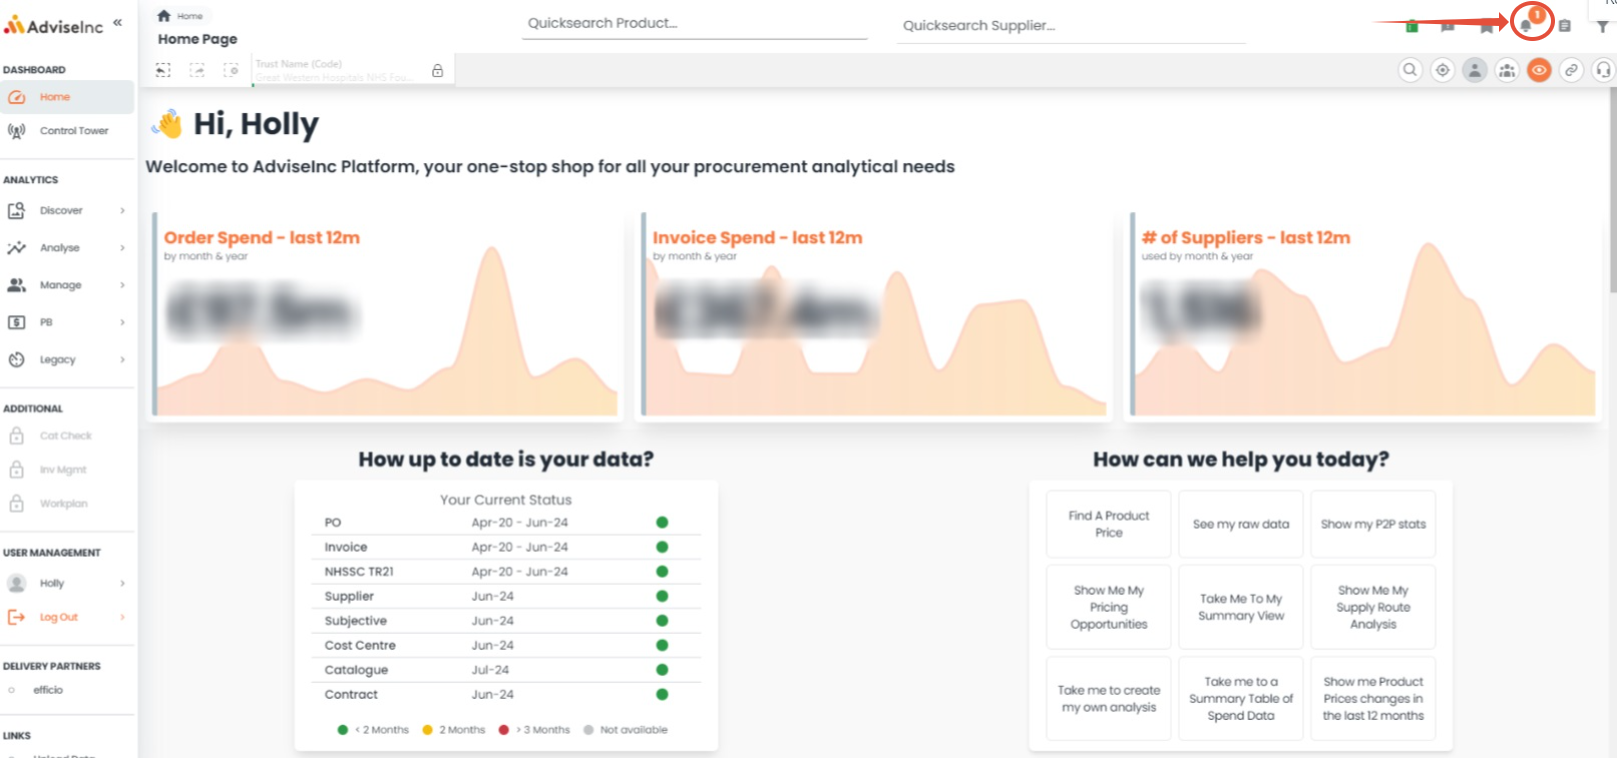
- Add the desired filters. These will be visible by selecting the bell icon in the top right of your page
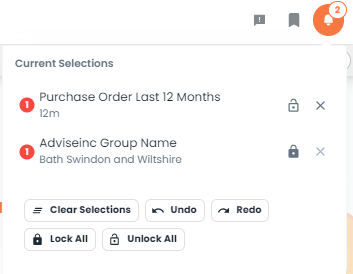
- On the right of the filter line, it will either show a closed padlock - locked or an open one - unlocked. To edit an individual filter click the padlock and this will switch its locked status.
- Alternatively, you can use the buttons below the filters to 'Lock All' or 'Unlock All' of the selected filters.
Step-by-Step Guide - utilising the selections along the top bar
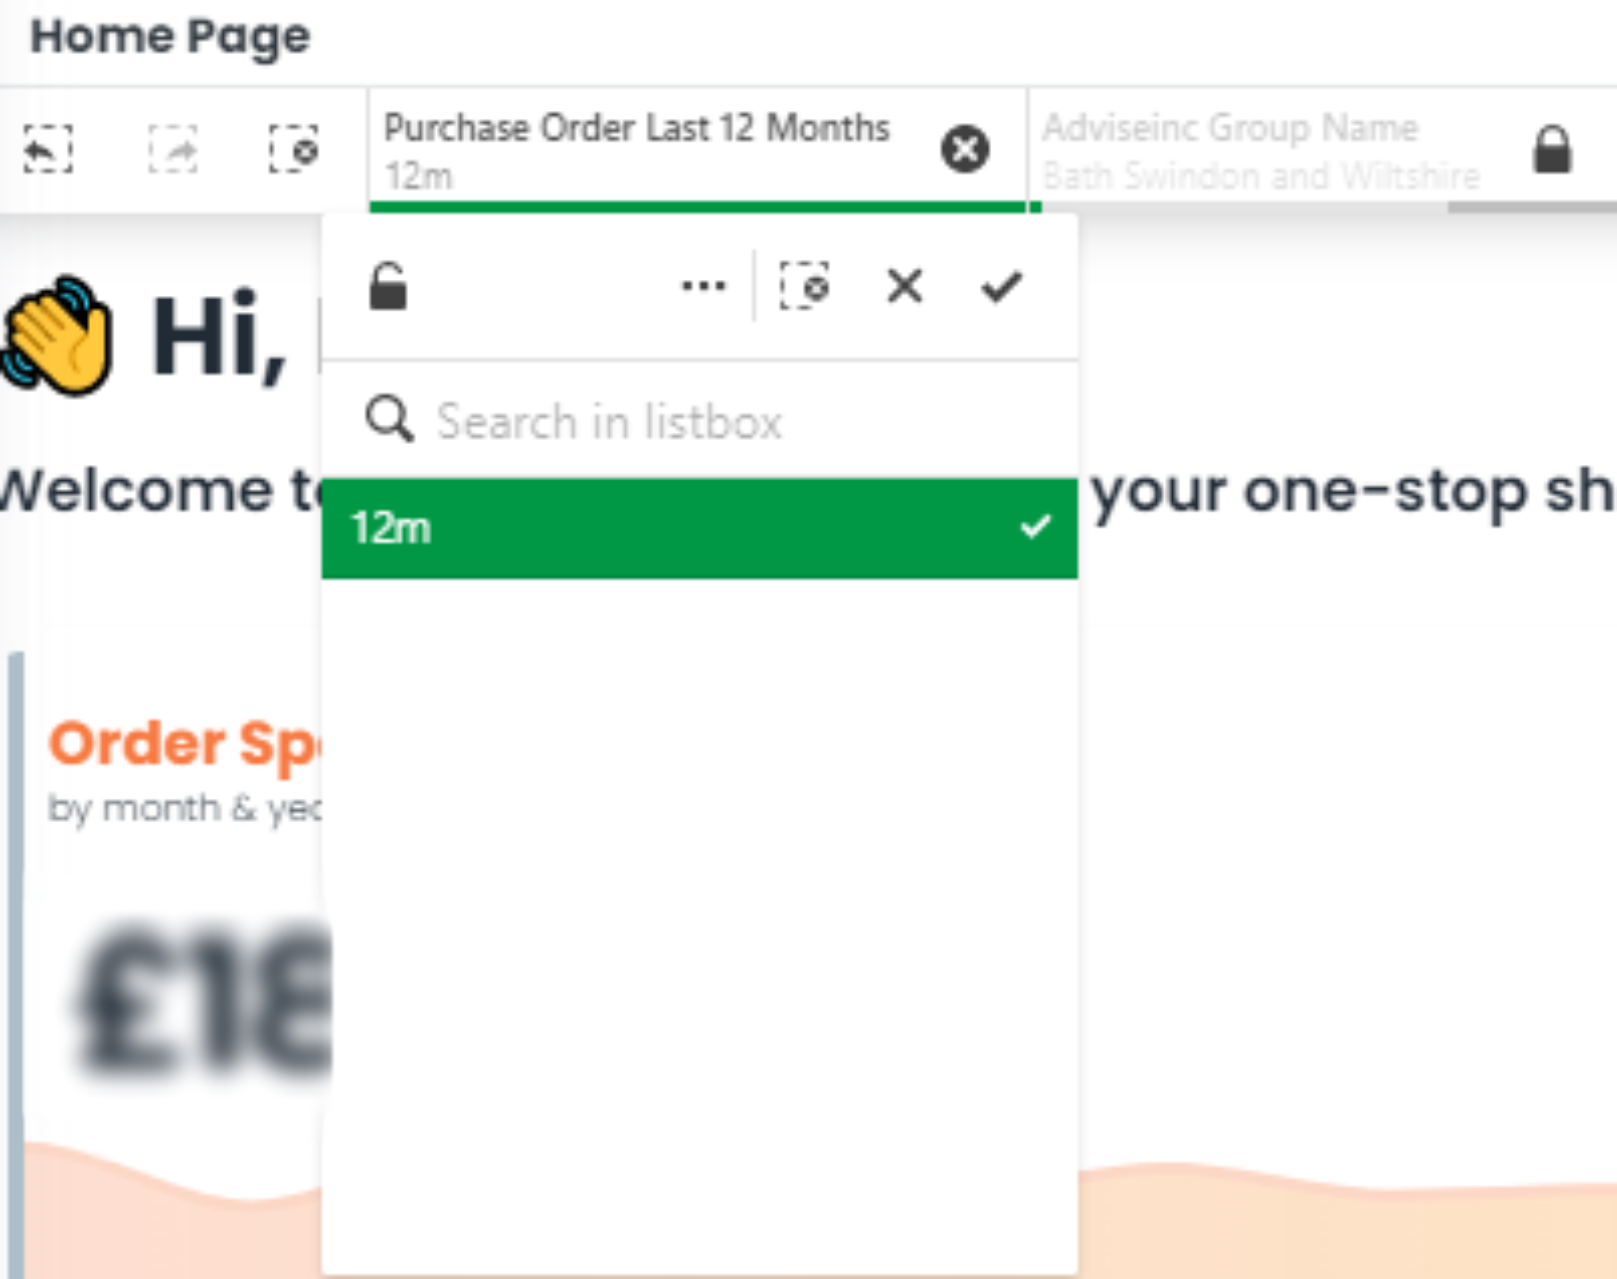
- Add the desired filters. These will appear along the top bar of your page. Locked filters will have a small closed padlock next to them and appear more greyed out.
- Click on the filter you wish to lock/unlock.
- On the top left of the drop-down, you will see either an open padlock - unlocked or a closed padlock - locked. Click on the padlock to switch the status of the individual filter. To change multiple locked statuses see "Step-by-Step Guide - utilising the current selections bell" further up this article.
If you have any questions, please don’t hesitate to get in touch at support@adviseinc.co.uk or phone us on 0207 112 9222.
Was this article helpful?
That’s Great!
Thank you for your feedback
Sorry! We couldn't be helpful
Thank you for your feedback
Feedback sent
We appreciate your effort and will try to fix the article